For Graham's first birthday party, I wasn't sure what to do because he isn't old enough to just love certain character or themes. However, I found a lot of cute ideas on Pinterest and it happened to work well with his Halloween birthday, so I chose a monster theme! I decided to try to make almost everything for the party even though I'm not particularly crafty, as I've mentioned in past blog posts. I'm also not that creative, so Pinterest saved the day!
The first thing I did was make the invitations. My sister, Christa, helped me make these. Here are some pictures of the fronts and back of those:
The day of the party, we decorated some. Here are some pictures of the decorations:
A monster face on the door; I thought it went well with the theme.
We had some decorative hanging balls and a banner I made.
This is a close-up of half of the banner I made. It has a picture from each of his monthly pictures (1 month, 2 month, etc.)... as well as monsters on the ends, of course!
I got monster books from the library and decorated with those. I thought they were very cute.
We also worked on making lots of yummy treats for our little monster and his party guests. Here are some of those:
I had some more books lined up in the kitchen. Here are the cups. I put our guests' names on each cup, ... as well as some wiggly monster eyes!
Ingredients to make monster pizzas.
Our plates, napkins and monster utensil holder (previously a tissue box). I'll do a blog post later on with a tutorial of how I made this monster utensil holder.
Monster munch, made by Dustin's mom. It was SO good!
Monster toes (a.k.a. pigs in a blanket).
Peeking monster cupcakes. My mom helped me make these.
Monster eyeballs (a.k.a. oreo balls).
Monster sandwiches and monster bones. The monster bones were made using pretzel sticks, mini marshmallows on both ends and that was dipped in melted white chocolate chips.
Dustin brought these late so they stayed in the bucket, but they are monster fingers (a.k.a. chicken fingers).
Finally, the monster drool, or punch. I liked the green coloring and it was pretty tasty if you ask me.
We tried to have activities the guests, Graham's cousins, would enjoy. First, we did a monster egg hunt. Here's a picture of the monster eggs before we hid them:
They had candy, and some of them money, in them.
Here are the girls on their hunt for eggs!
We also did a monster making station. Here is one monster that was made.
Graham's cousin Maggie was proud of her monster... and I don't blame her! It was pretty cool.
Here is Emmy's monster. I loved it!
We also had a coloring station. Here are the results of that.
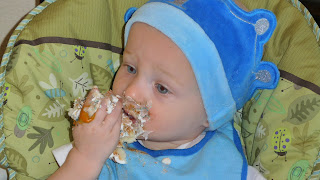
Of course, we had a smash cake for Graham... monster style!
He was cautious at first but by the end, he was really enjoying the cake and making a mess. I thought he looked like a gnome or something with the cake frosting beard.
We had favor bags for Graham's cousins and they included monster stickers, monster tattoos, their favorite candy, monster candy bars, jack-o-lantern fruit cups, and Mold A Monster Kits (Play-Doh and wiggly eyes to make their own monsters with). Thank you, Everyday Mom Ideas, for the Mold A Monster Kit printables!
I decorated the favor bags with monsters on the front. I could have sworn I took a picture of the front of the favor bags because they were super cute but I couldn't locate it! So sad. But you can sort of see 2 of the 3 them in these pictures.
Planning a monster themed party was very fun, but it wouldn't have been a success without the presence of all the loved ones who truly made it so special: Graham's grandparents, his Aunt Lori and cousins, Maggie, Marin and Emmy, and his Aunt Christa and her boyfriend, Charles. Dustin, Graham and I are so blessed to have these wonderful people in our lives. Thank you all for making Graham's first birthday one to remember!
Here's the electronic thank-you note we sent out via the Red Stamp app:
Oh, and here is Graham's Halloween costume: he was a little monster, of course!
Here's to many more fun birthdays for my sweet little monster!
Until next time,
Lyndsey


